
Here’s my reality: I’m not really big into small holidays. Halloween, Valentine’s Day, St. Patrick’s Day, the 4th of July…they’re all great but the thing that gets me most excited about them is the Target clearance sales once they’re over.
But I have one daughter who LOVES celebration. She loves parties, she loves friends, she loves getting to enjoy a specially themed day of joy. Halloween, Valentine’s Day, St. Patrick’s Day, the 4th of July, Arbor Day, National Yogurt Day, you name it, my Glass Slipper is here for it.
So even though I’m not super into the idea of spending a ton of money on a holiday I’m ambivalent about, because I love my daughter and want to encourage her passions, I have to find a thrifty way to embrace the celebration.
One way we do that is by making our own Valentine’s Day cards. Now I’ll be upfront and say this is not the most time friendly option. It usually takes us a few days. But I actually love that, because it’s a few days of of a different creativite activity with my kiddos. I get a break from tea parties.
Our two rules for homemade cards:
- We only use materials we already have in the house.
- I buy craft supplies like I buy everything else: when they’re on sale. So my stock is eclectic, but you know there is something valentinesy in there from last year’s clearance sale. While it’s super fun to go to the craft store and get a bunch of materials to make cards, resist the urge to do it right before Valentine’s Day, since that’s when the prices will be high. Stock up AFTER the big day and you’ll be all set for next year.
We decide theme after we assemble our materials. The more specific an idea of what you have, the more money it’s going to cost. This is true across the board. If you go in with a vague idea, or open to new ideas, you’ll be able to find more options with what you have. I don’t ask my craft loving girl, “what kind of card do you want?” Because then she is going to say, “Paw Patrol” and I don’t know how to make that out of pipe cleaner and glitter. What I do say is: “What art supplies do you like the best?” After she picks her poison, then I ask, “Okay, what kind of cards can we make from these?” That enables her to use her imagination and be an active participant. You don’t want this to turn into you hand making 15 cards while she sits nearby, eating grapes.
A little tip for the non-crafty mamas like me: do some Pinterest surfing beforehand! I look up “homemade Valentine’s” to give myself an idea of what CAN be done and how I COULD do it, since crafting is not in my nature. This helps me feel prepared for whatever my kiddo throws at me.
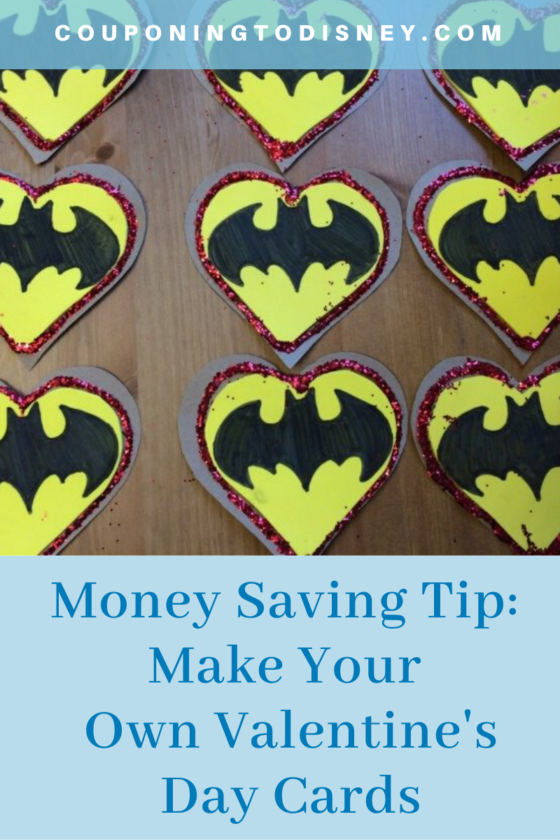
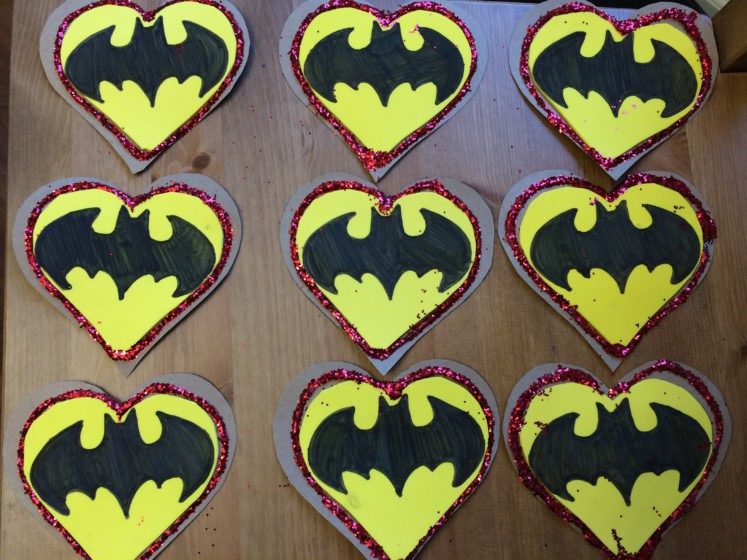
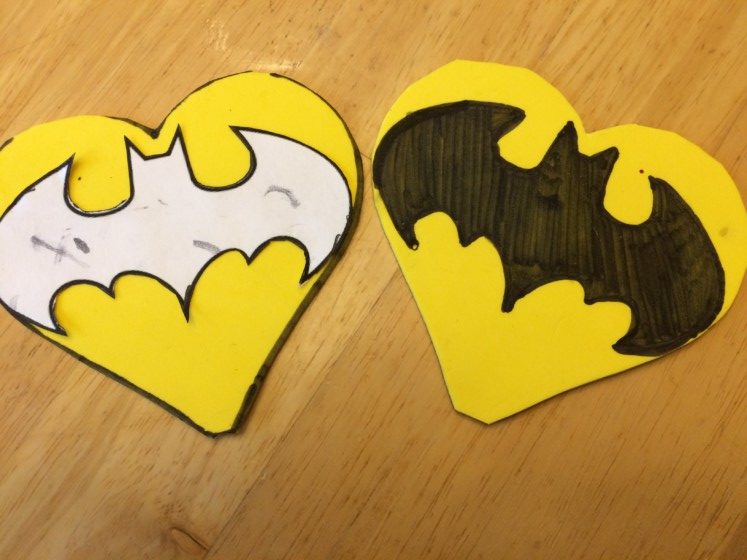
So check out these beautiful Batman Inspired Valentine’s Day cards we made last year!
We had:
- Brown card stock
- Red glitter
- Yellow foam stars
- Sharpies
- Elmer’s Glue
- Modge Podge
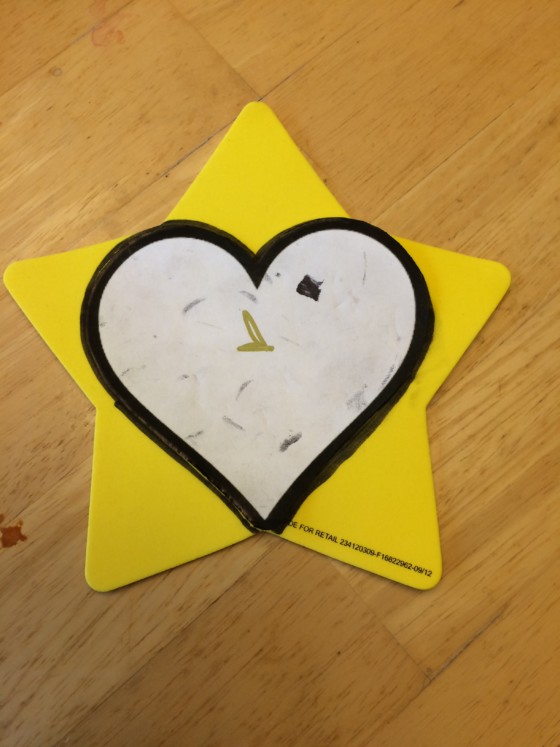
The Glass Slipper saw those yellow foam stars and she was immediately like, “Batman!” And I was like, “herm, what?” But after she described to me how she wanted the card to look like the Bat Signal in a heart, it clicked for me.
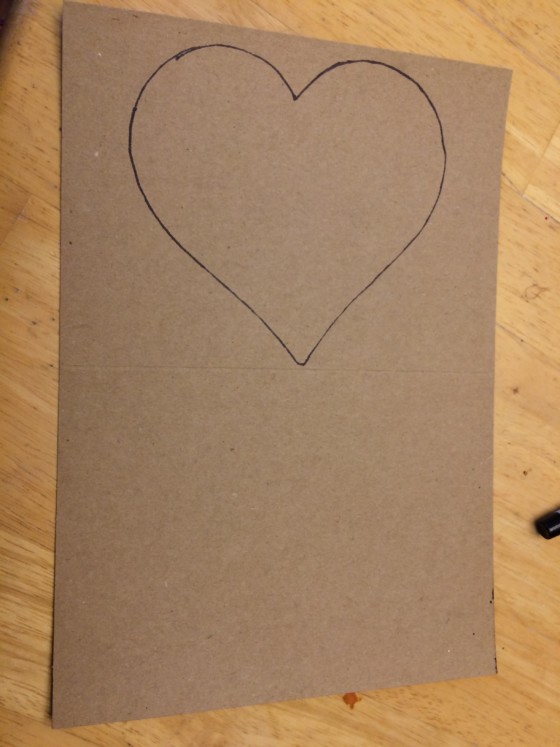
I printed a heart and bat symbol from the internet for tracing purposes. First we traced the heart from the yellow foam star.
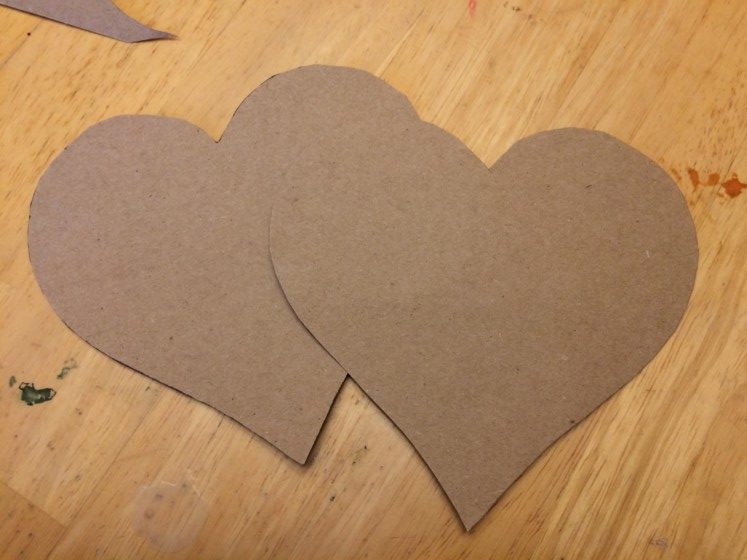
We realized quickly we needed a firmer backing, so we traced a slightly larger heart from brown card stock and glued the foam heart on with Modge Podge. Worked like a dream.
Next, we traced the Bat signal onto the yellow heart and colored it in with Sharpie. The foam was a little color resistant at first, so we had to do two coats of marker.
On the back, I used a Gold Sharpie to write:
You’re my SUPER friend! Have a Happy Valentine’s Day!
The Glass Slipper signed each one, natch.
Then we traced the edge of the cards with Elmer’s Glue, liberally sprinkling the card with red glitter. The glitter stuck to the glue and gave us a beautiful border of our card.
And that was that! It cost me absolutely no money. And you may be like, “Okay, Kristen, big deal, you saved $4.” First, yes, it is a big deal. I love saving any dollars. Second, it was $4 that year. But this year, I had TWO kids who needed Valentine’s Day cards. That’s $8. In a few years, it will be 3, which is $12. $12 a year for the next five years is $60. That’s a Quick Service Lunch at Disney, y’all! That’s like 10 Mickey Bars.
Finding the small ways to save money is what makes my Disney trips happen. I’m a stay at home mom, so the opportunities on the ground to make thousands of dollars to go on vacation are pretty slim. Instead, making small adjustments to what I do everyday is the way I’m able to fund my family’s vacations.
And the real bonus for me is how much fun my girls and I have doing this. If Valentine’s Day is about celebrating the people you love, I can think of no better way of doing that than quality time with your loved ones, engaged in an activity that brings them joy. Maybe I do like this holiday after all.
If you’re into making your own cards and saving a few dollars, check out my post on how to make your own Christmas cards!
Are you a big Valentine’s Day fan? Do you live to make your own cards? What are some of your Valentine’s Day traditions? Share the love in the comments!
 Kristen B. is wife to the best Prince around, mama to the spunkiest little princesses, and lover of all things Disney. She started her savings journey five years ago and is now dedicated to making her family’s wishes come true one coupon at a time. She is so excited to take her love of saving to the next level and share her journey with you! Click here to catch up on Kristen’s Savings and join in on your own savings adventure!