@DisneyParksBlog
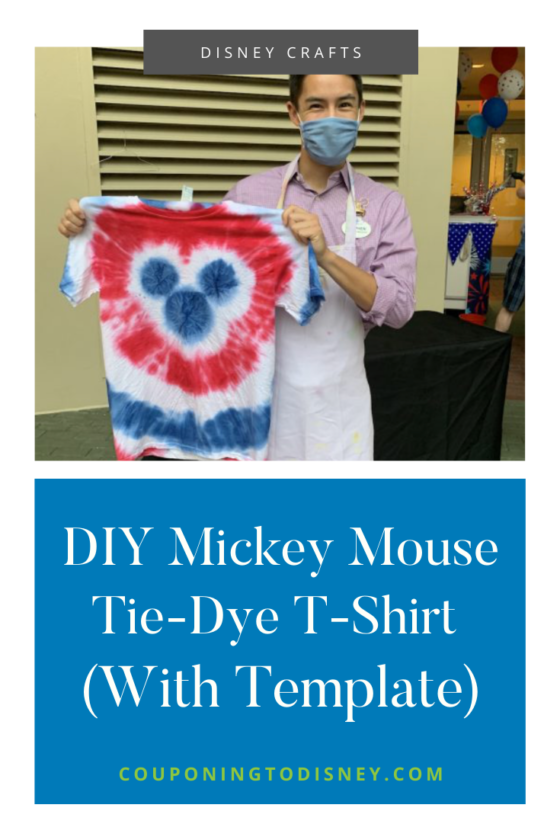
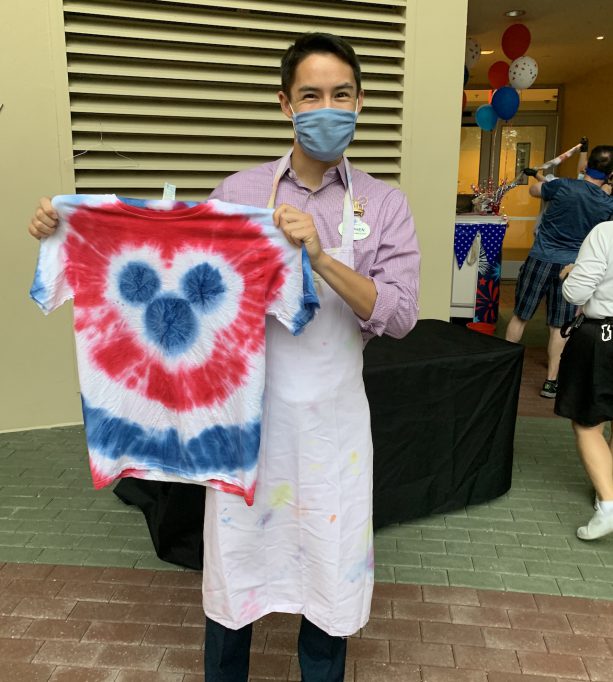
Missing Disney? Here is a fun DIY Mickey Tie-Dye Shirt how-to. Perfect for when you want to add some Disney fun at home. Pick your colors to match your favorite sports team, holiday and more.
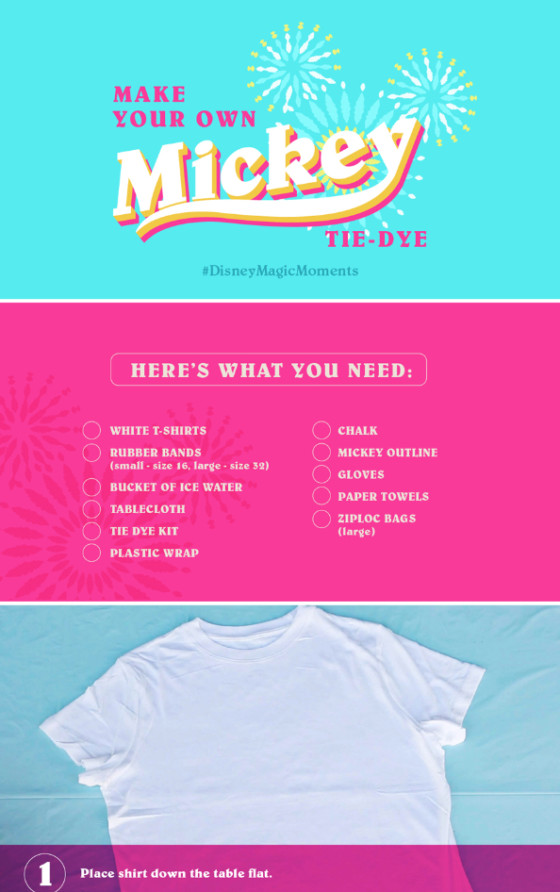
First, Gather Supplies:
- White T-Shirts
- Rubber Bands
- Bucket of ice water
- Tablecloth
- Tie-Dye Kit
- Plastic Wrap
- Chalk
- Mickey Outline (below)
- Gloves
- Paper Towels
- Large Ziploc Bags
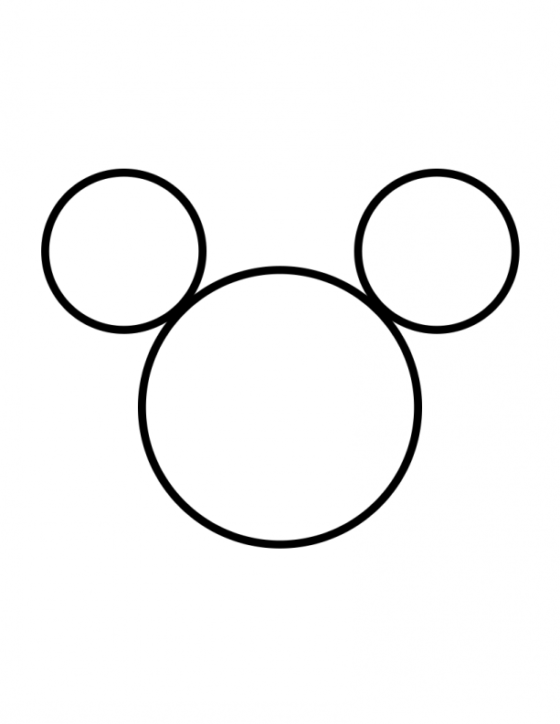
Mickey Outline Template:
Step 1:
Lay T-Shirt On a flat surface.
Step 2:
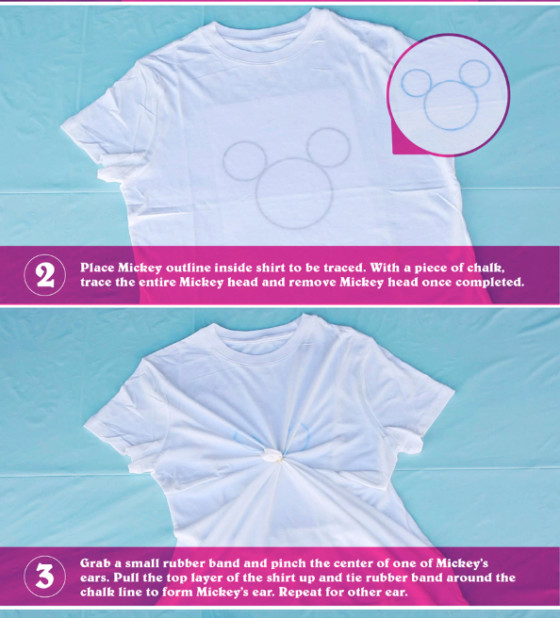
Trace Mickey Outline on shirt.
Step 3:
Pinch center of one of Mickey’s ears and place a small rubber band. Repeat for other ear.

Step 4:
Repeat same process in Step 3 for Mickey’s head.
Step 5:
Continue adding rubber bands 2 inches apart from Mickey’s head.
Step 6:
Put on rubber gloves and dunk shirt in bucket of water. Then take shirt out after its soaked and wring it out.
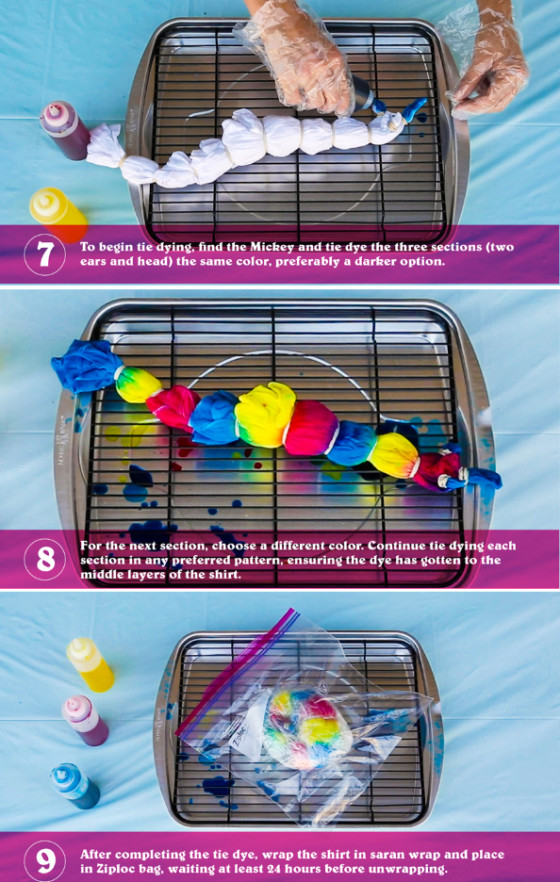
Step 7:
Start by placing the dye at Mickey’s head and ears, the same color.
Step 8:
Continue to dye each section a different color.
Step 9:
Once done, wrap shirt in saran wrap and put in Ziploc bag for at least 24 hours.
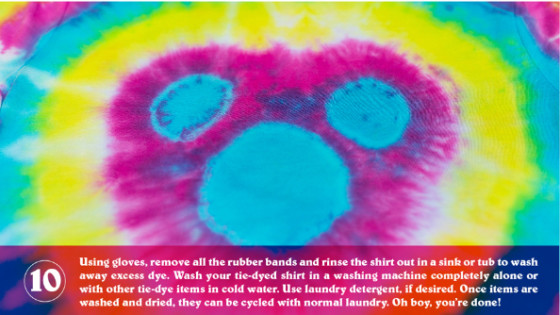
Step 10:
Put gloves on to remove shirt from bag and remove rubber bands. Wash before wear. Enjoy!
What colors would you choose?!
Learn more about planning your Walt Disney World vacation. Plus overwhelmed with all the planning? Destinations in Florida can help you plan your perfect trip.