Jessica Shockney is a mother of two and a Baltimore City Firefighters’ wife. Passionate about writing, photography, baking and gardening, she’s a busy mom trying to keep up in a Pinterest world of successes and fails

Save for Family Vacations
By brandyvasquez14 on at

Jessica Shockney is a mother of two and a Baltimore City Firefighters’ wife. Passionate about writing, photography, baking and gardening, she’s a busy mom trying to keep up in a Pinterest world of successes and fails
By brandyvasquez14

By brandyvasquez14 on at

Jessica Shockney is a mother of two and a Baltimore City Firefighters’ wife. Passionate about writing, photography, baking and gardening, she’s a busy mom trying to keep up in a Pinterest world of successes and fails.
By brandyvasquez14 on at

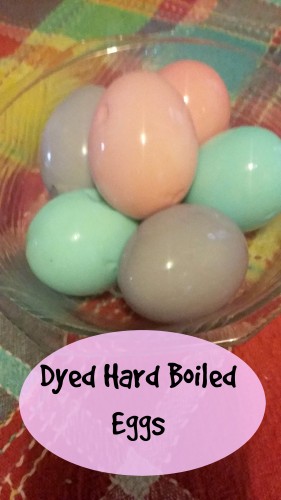
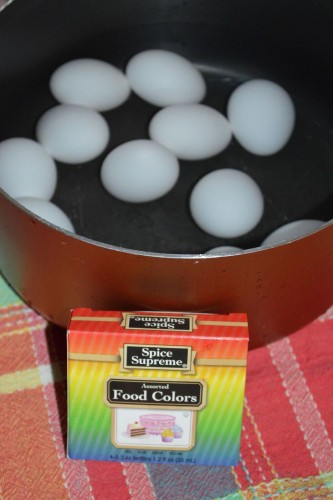
Using food dye to color hard boiled eggs can be a fun way to add some color to your favorite recipes. The process is fast and simple and the colored eggs are safe and fun to eat. First you have to hard boil your eggs; this process has been the most effective for me.

*Place your eggs in a large pot and cover with water
*Bring the uncovered pot to a boil
*Remove the pot from heat and place a lid on the pot
*Set timer for 7 minutes
*Drain the water and rinse the eggs in cold water
Once your eggs are completely cool they should peel easily. Your eggs are now ready to be dyed.
Assemble a few glasses or bowls of water. Add a few drops of your favorite food coloring to the various bowls creating different colors.
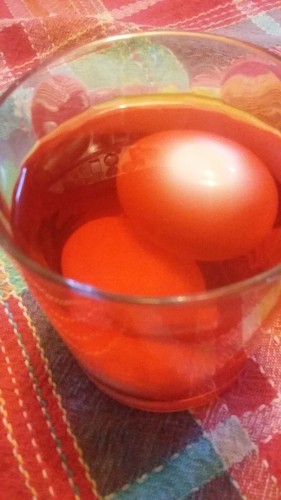
Submerge the eggs into the colored water. Allow the eggs to soak in the water until they have reached the desired color.
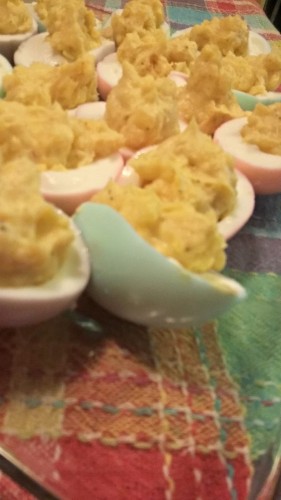
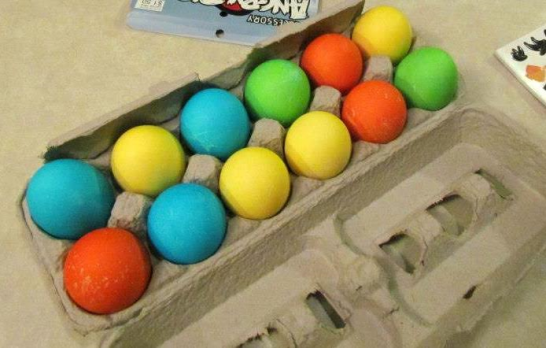
The pastel eggs shown in the pictures soaked in the water for approximately 10 minutes each. Remove the eggs, dry and add to your favorite recipes. I love making deviled eggs with these around Easter. They would also make fun toppings on a salad.
Jessica Shockney is a mother of two and a Baltimore City Firefighters’ wife. Passionate about writing, photography, baking and gardening, she’s a busy mom trying to keep up in a Pinterest world of successes and fails.
By Kristin from Couponing to Disney

Chili is one of my favorite things to make its tasty, freezes well, cheap to make, filling, and leftovers can be used in different recipes to recreate a whole new meal! I was able to get 3 meals for 6 people out of one pot of chili that cost just $10.00 to make.
TIP: I make a big pot of beans 2lbs of dry beans or more once a month and divide them out in quart size freezer bags to use in recipes just like this saving my self at least $6.00 per month. 1lbs of dry beans costs around $1.00 and makes around 4 cups of cooked beans 4 8oz cans of cooked beans will cost you around $4.00.
Crockpot Chili
1 pound of ground beef
4 cups or cans of cooked beans whichever kind you like to use
1 32oz can of diced tomatoes
1 16oz can of tomato sauce
2 large onions diced
4 T. minced garlic or 4 cloves of garlic
2 packets of your favorite chili seasoning packets
Dump everything in the crockpot. Add enough water to make the crockpot be 3/4 of the way full. Cook over high heat for 6-8 hour.
Day 1 of Chili it’s what’s for dinner!
Chili with all your favorite toppings for me that is sour cream, cheese, and diced onions with saltine crackers.
Day 2 of Chili its what’s for dinner!
Chili Mac and Cheese
1 bag or box of pasta
4 cups of Chili
1lb of Cheese shredded.
Boil the pasta according to the package directions. While the pasta is draining add the chili to the pot your boiled the pasta in warm it over medium heat. Add the shredded cheese and stir until its melted and mixed in thoroughly. Return the pasta to the pot and stir to mix the sauce with the pasta. Enjoy!
Day 3 of Chili it’s what’s for dinner!
Chili Cheese hot dogs
1 package of hot dogs
1 package of buns
1/2lb of Shredded cheese
1 diced onion
Mayonnaise
Mustard
Boil the hotdogs until warmed. In a separate pot warm 4 cups of chili. Cut the hotdog in half so that with every bite you will get hotdog. Spread mayonnaise on the bun place the half hotdog on each side of the bun. Top with chili, cheese, mustard, and onions. Enjoy!
Brandy is a mother of 4 and a self proclaimed foodie. She believes that food nourishes the soul and prides herself on cooking budget friendly meals from scratch that are flavorful and healthy.
By Kristin from Couponing to Disney on at

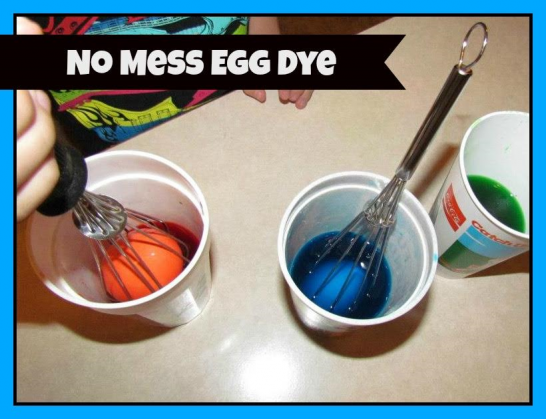
This is genius! I found this idea several years ago on the internet, and we have successfully used it for the last 3 years, with NO messes. I used to despise dying eggs, because the eggs always fell of the spoons and broke. It was more messy than fun. The solution to this……an egg whisk! I bought 2 at the Dollar Tree, and they are the perfect size for our eggs. Simply hard boil your eggs and let
them cool.

When you’re ready to dye them, gently pull the pieces of the whisk apart, and insert your egg. Dip the egg into the dye and let sit for as long as you’d like.
Remove the whisk, and carefully shake off any drips.
Open the whisk, and gently let the egg drop onto a drying rack.
The kids love it, and it’s pretty much impossible for the egg to fall out! Needless to say, we love dying eggs now.

P.S. – If you’re looking for a simple egg dye that produces bright colors, try Kool-Aid. In a small cup, mix the Kool-Aid with enough water to cover the egg. That’s it. Nothing else is needed. The colors are vibrant, and they smell delicious!
Kristi is a stay-at-home homeschooling mom of two. She loves complete DIY projects especially ones that saves her money.
By brandyvasquez14 on at

These super easy leprechaun cookies are the perfect kids craft for Saint Patrick’s Day. Adorable little leprechaun Nutter Butter cookies are as much fun to make as they are to eat! They are no bake and only have 4 ingredients.
Ingredients
Nutter Butter Cookies
1 package of CandiQuick Vanilla
Food Coloring
Black decorating gel
Melt the CandiQuick according to package directions. Divide into two bowls. Color one bowl green and one bowl orange adding one drop at a time to your color darkness preference. Dip one side of the Nutter Butter cookie into the orange coating and drag some up the sides of the cookie to make sideburns using a spoon or a toothpick. Dip the other end of the cookie into the green coating to make a hat, covering the top of the sideburns. Place the candy covered cookies onto a piece of wax paper and allow to dry completely, about 20 minutes. Once dry use the gel to draw in a hat brim and a face. For added fun dress your leprechauns up with sprinkles or candy eyes!
Jessica Shockney is a mother of two and a Baltimore City Firefighters’ wife. Passionate about writing, photography, baking and gardening, she’s a busy mom trying to keep up in a Pinterest world of successes and fails.
By brandyvasquez14 on at

I love Kale chips! Have you eaten them before? I never even knew such a thing existed until one day I was watching the Food Network they had a special about this little café in California and how they where famous for Kale chips. I was intrigued to say the least!
I am always looking for creative ways to get my family to eat more vegetables. I honestly didn’t think anyone would eat them. But I thought it was worth a try. Boy oh boy was I surprised not only did the kids finish the whole tray before I even sat down to try them they asked me to make more. That is always a good sign. I made another tray and I really enjoyed them in fact we enjoy them so much that I make Kale chips a few times a week. They are a great snack and perfect for lunches plus the taste better then potato chips.
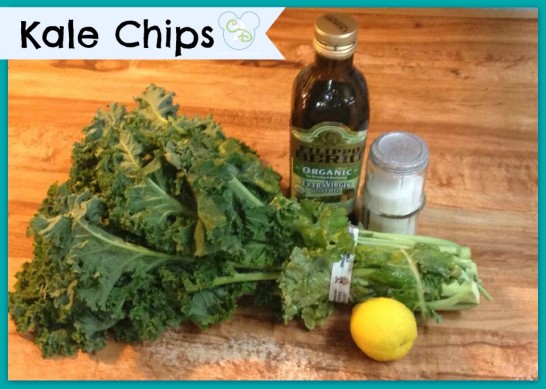
Ingredients:
1 Bunch of Kale
3 Tablespoons Olive oil or whatever oil you use to cook with
1 Lemon
Salt
Directions:
Rinse the Kale really well then lay it on a dry dish cloth to drain. Pull the leaves away from the stems then place them on a baking sheet. Cut the lemon in half and squeeze half of it on top of the Kale, drizzle the olive oil over the top, and sprinkle salt to taste over the leaves. Using your hands mix around the leaves to thoroughly coat them with the lemon juice and olive oil. Lay them the Kale leaves flat in the baking sheet sprinkle a little more salt. Bake at 400 F for 10 minutes.
Brandy is a mother of 4 and a self proclaimed foodie. She believes that food nourishes the soul and prides herself on cooking budget friendly meals from scratch that are flavorful and healthy.
By brandyvasquez14 on at

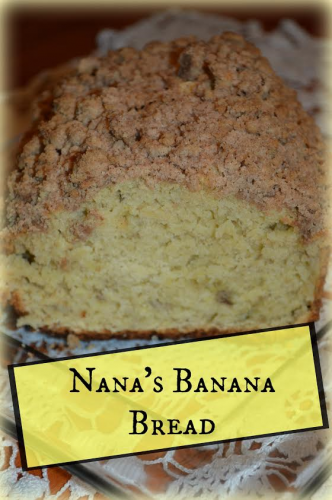
A crumble topping on moist homemade banana bread would make any Grandma proud! But you don’t have to spend all day to make a sweet loaf of homemade bread. In my home we either go through bananas like crazy or a few lonely bananas get forgotten and start to get overripe. Once that happens I know its banana bread time!
Ingredients
Bread:
2 cups of flour
1 cup of sugar
2 tsp baking powder
1 tsp salt
2 mashed overripe bananas
½ butter cut into pieces
2 eggs
1 tsp vanilla
1 tsp ground ginger
Optional 1 cup of chopped nuts of your choice
Crumble Topping:
½ cup flour
¼ sugar
¼ melted butter
¾ tsp cinnamon
Preheat oven to 350 degrees. Mix together the topping ingredients until crumbly and set aside. For the banana bread, combine the flour, baking powder and salt. Cut in the butter until evenly distributed. Stir in remaining bread ingredients and pour into a greased loaf pan. Top with crumbled topping and bake for approximately 70 minutes or until and inserted toothpick comes out clean. Serve warm with a glass of milk just like Nana did!
Tip: Use leftover banana bread to make French toast!
Jessica Shockney is a mother of two and a Baltimore City Firefighters’ wife. Passionate about writing, photography, baking and gardening, she’s a busy mom trying to keep up in a Pinterest world of successes and fails

By brandyvasquez14 on at

Bring a little Disney magic to your table! One of my readers gave me the inspiration for these beauties. She posted this picture in my Facebook group the SavEars on Superbowl Sunday. They taste, smell, and look like Ohana’s Honey Coriander Wings.
Ingredients:
4 pounds chicken wings/drummettes
Spice Rub
1 tablespoon salt
2 tablespoons paprika
2 tablespoons sugar
1/2 teaspoon black pepper
1/2 teaspoon turmeric
1/2 teaspoon ground cinnamon
1/4 teaspoon cayenne pepper
4 tablespoons olive oil or whatever type of oil you use
Wing Sauce
1 tablespoon chili powder
1/2 teaspoon ground ginger
1 tablespoon ground coriander
2 tablespoons lime juice
1/2 cup soy sauce
1 cup honey
3/4 cup water
2 tablespoons cornstarch
By brandyvasquez14 on at

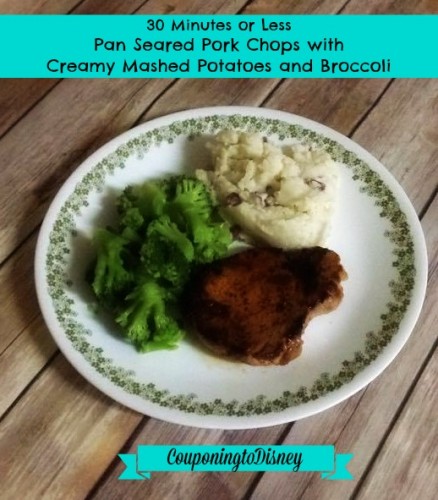
I love pork! It is cheap even for lean cuts, versatile, and very flavorful. I always have some sort of cut of pork chops in my freezer for those nights that for whatever reason its 3:00 p.m. only 3 more hours till dinner time in my house and I have nothing started. Pork chops are my go to they thaw rather quickly and if your in a hurry and need them right away you can always quickly defrost them in the microwave. This 30 minutes or less meal never lets me down and cost about $1.62 per serving. The recipe below will be enough for 4 adult sized portions.
Pan Seared Pork Chops with Creamy Mashed Potatoes and Broccoli:
Pork Chops (you want one pork chop per person)
Seasonings
Olive Oil
10 small or 5 large potatoes
1/4 cup Half and half or milk
4 Tablespoons Butter
1/4 cup Sour Cream
2 cups frozen broccoli or 1 small package
First you want to add about a tablespoon of Olive oil to your skillet and turn it on medium high let it warm up while your starting the potatoes. Then scrub the potatoes and cube them for boiling. I leave the skin on mine it speeds up the whole process plus it looks more rustic which I like. Add the potatoes and a dash of salt to a pot (I use my dutch oven). Turn them on med.-high and cover them with a lid it makes them boil faster.
Season you pork chops with whatever seasonings your family enjoys. We like seasoning salt, garlic powder, and pepper. Place the pork chops seasoned side down in the pan. The pork chops should cook for about 10 minutes per side. Season the side of the pork chops facing up.
Fill a pot with water add salt and the frozen broccoli cover with a lid and turn it on medium heat.
After roughly 10 minutes have passed check to see if the side facing down in the pan has a nice sear. If it does flip the pork chop over. If not give it a few more minutes until they are seared. After you flip the pork chops they need to cook for another 10 minutes until the that side has a nice sear as well.
Check you potatoes and see if they are soft enough to mash. If the potatoes are soft enough to mash drain them. After they are drained return them to the pot that you boiled them in.
Cut the butter into 4 pieces and add it to different areas of the pot so that all the potatoes have a chance to soak up some of that goodness. I use a masher to mash my potatoes but you can use a fork to roughly mash them. Add the milk, sour cream, salt, and pepper to taste. Then stir it in to mix it if you need more milk add it until you reach the consistency you like.
By this time the broccoli should be done turn it off.
After your pork chops have finished cooking allow them to rest on a plate for a few minutes so that the juices can settle and not run out leaving you with dry meat.
Brandy is a mother of 4 and a self proclaimed foodie. She believes that food nourishes the soul and prides herself on cooking budget friendly meals from scratch that are flavorful and healthy.
By Kristin from Couponing to Disney on at

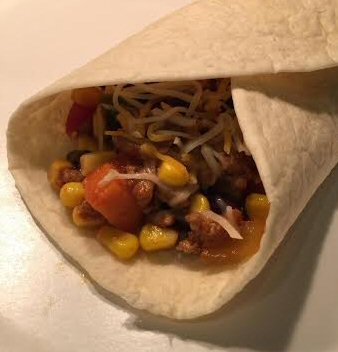
This recipe makes 12 servings! You could freeze half of the batch for the next time.
1 lb ground turkey
1 onion chopped
1 bell pepper chopped
1 package taco seasoning
1 small can tomato sauce
1/2 can corn (drained)
1 can black beans (rinsed and drained)
2 sweet potatoes
optional:
shredded cheese
sour cream
tortilla
peel sweet potatoes… cut into bite size pieces… cook in 400 degree oven until starting to get soft (you don’t want them mushy)
brown and drain turkey
saute onion and bell pepper until translucent
add turkey back into pan
stir in taco seasoning and tomato sauce
stir in corn and beans
heat through then add in sweet potatoes
Can top with shredded cheese and/or sour cream. Can also serve in a tortilla like a burrito.
Without the cheese, sour cream or tortilla – this is only about 150 calories!
(Thanks Tammy!)
By Kristin from Couponing to Disney on at

This is a classic hearty chili recipe, perfect for cold winter days. It can easily be doubled (or even tripled if you a have a big enough pot) so that you can freeze some for your next snow day or game day party.
Ingredients
2 medium onions diced
1 and a ½ lbs. ground beef
1 teaspoon chopped garlic
3-14 ½ ounce cans of diced tomatoes
2-15 ounce cans of kidney beans drained
Seasoning Mix- A store bought chili seasoning packet will be enough for one pot of this chili or use my seasoning blend:
1 ½ teaspoon oregano
1 ½ teaspoon cumin
1 teaspoon seasoned salt
1 teaspoon sugar
½ teaspoon pepper
½ teaspoon red pepper
1 to 2 tablespoons chili powder
Brown together the ground beef onions and garlic drain well. Return to pot and add in remaining ingredients. Bring to a low boil, reduce heat and simmer for 30 minutes. Top with your favorite chili toppings such as sour cream, cheese and banana peppers. Enjoy!
Jessica Shockney is a mother of two and a Baltimore City Firefighters’ wife. Passionate about writing, photography, baking and gardening, she’s a busy mom trying to keep up in a Pinterest world of successes and fails.
By Kristin from Couponing to Disney on at

Ever make too many mashed potatoes? Next time you find yourself with a bowl full of left over potatoes that everyone is tired of consider turning them into this tasty side dish. These bites are easy to whip up and give a little life into your old potatoes.
Ingredients
2 cups of mashed potatoes
2 eggs
½ cup shredded cheddar cheese
1 tablespoon diced chives
Preheat your oven to 375. Grease a mini muffin pan with non-stick spray. Stir all of the ingredients together and fill the muffin pan with the potato mix. Bake for 10-15 minutes or until the top of the bites begin to brown. The bites are ready to serve right out of the oven. This recipe can be altered to your tastes or what you have on hand, consider adding some ranch seasoning or using pepper jack cheese instead of cheddar!
Jessica Shockney is a mother of two and a Baltimore City Firefighters’ wife. Passionate about writing, photography, baking and gardening, she’s a busy mom trying to keep up in a Pinterest world of successes and fails.
By brandyvasquez14 on at
I love to eat homemade chicken pot pie when the weather is cool out. It is so simple and this recipe makes 2 13″ pies or 2 small casserole pans. I always make one for that evening and the second I put in an aluminum pan and freeze. This is a great money saving meal and tastes even better the next day heated up. This recipe costs just $10.00 for 16 servings that is $1.60 per serving and is a complete meal.
Chicken Pot Pie
Note-I have used rotisserie chicken and chicken bullion instead of boiling the chicken and the flavor is almost identical.
1 whole fryer or 8 pieces (whatever is cheaper)
6 Stalks of Celery2 Onions
1/2 Stick (4T) of Butter (Use real butter it gives it such a richer taste.)
1 Small package of Frozen Peas
4 Carrots or 1 package of Matchstick carrots
1/4 C. Flour
2 C. Chicken Stock or broth reserved from boiling the chicken
1 C. Half and Half or Evaporated milk
1 Sprig or Thyme or 1 T.
Pie Crust Recipe to Follow
Roughly chop up 4 stalks of celery, 1 onion, and 1 carrot add it to a large stock pot of water with the cut up fryer or chicken pieces add salt and pepper and 1/2 of the thyme. Bring to a boil and cook for 2 hours. After 2 hours you should see that the meat is cooked thoroughly. At this point the chicken should be falling of the bone. Take the chicken out of the pot and sit it on a large platter to cool. After it is cooled debone the chicken and sit it aside.
Chop up the remaining celery, onion, carrots and thyme. Melt the butter over medium heat add all the remaining vegetables including the peas to the melted butter. Cook for 5-10 minutes stirring frequently until you see that the onion is translucent. Add the Chicken and stir to combine. Sprinkle the flour over the mixture stir it gently and let it cook for a few minutes. Pour in the 2 cups of reserved chicken stock from boiling the chicken. Pour in the half and half or evaporated milk turn the mixture to low and allow it to come together add more salt and pepper if needed taste to see if it is to your liking. Pour the half of the chicken mixture into a deep dish pie pan or casserole. Pour the other half into an aluminum pan.
Roll out the pie crust so that its 1 inch larger then the pan. Place the pie crust over the chicken mixture. Cut small slits in the top so steam can escape. Press the crust gently into the sides of the dish to seal.
Bake for 40 minutes at 375 F or until the crust is golden brown. Cool for 15 minutes this step is very important to ensure when you cut into it, it doesn’t run.
Perfect Pie Crust
makes 2 pie crusts
I double the recipe and make 4 pie crusts at a time and freeze them individually inside gallon ziploc bags. Use a rolling pin to flatten the dough out after it is inside the ziploc bag and write on the outside of bag what is inside and the date so later on you don’t have mystery in your freezer. When you are ready to use the dough set it out on the counter for half an hour or so and then it will be ready to roll out on floured surface. It is actually easier to roll the chilled dough then room tempurture
3 cups all purpose flour
1 teaspoon of salt
1 1/2 cups vegetable shortening
1 egg
5 Tablespoons of cold water
1 Tablespoon distilled vinegar
Combine the flour and salt in a large bowl. Add the shortening using a pasty cutter until the mixture resembles tiny rocks this should take about 5 minutes. Lightly beat the egg then add the egg to the mixture. Next add the cold water and vinegar. Stir the mixture together until its just combined. Then divide the dough so that you have 2 crusts. Roll out on a lightly floured surface.
Brandy is a mother of 4 and a self proclaimed foodie. She believes that food nourishes the soul and prides herself on cooking budget friendly meals from scratch that are flavorful and healthy.
By Kristin from Couponing to Disney on at
Key Lime Pie is a refreshing and creamy dessert inside a crumbly graham cracker crust. This is a rich and creamy from scratch recipe with a tart, sweetened sour cream top layer. If you are short on time a premade graham cracker crust will work perfectly and the top layer can be omitted, giving you a quick and easy key lime pie but if you are feeling decadent use the full from scratch recipe and impress your guests!
Graham Cracker Crust
18 whole graham crackers- crushed
1/3 cup sugar
1/3 cup melted butter
Filling
2 tablespoons lime zest
¾ cup key lime juice (regular lime juice will work as well)
4 egg yolks
2- 14 ounce cans of sweetened condensed milk
Topping
½ cup sour cream
2 tablespoons powdered sugar
Stir together all of the crust ingredients and press into a 9” pie plate. It will look like a lot of crust at first but just keep pressing into the bottom and up the sides of the pie pan. Bake the crust for 5 minutes. Cool while preparing the filling. Mix together the filling ingredients and blend with an electric mixer until think and well combined, pour into the pie crust and bake for 30 minutes or until the pie is no longer “jiggly” do not brown the filling. Cool the pie for at least one hour before spreading on the top layer. Refrigerate until ready to serve. Enjoy!
Jessica Shockney is a mother of two and a Baltimore City Firefighters’ wife. Passionate about writing, photography, baking and gardening, she’s a busy mom trying to keep up in a Pinterest world of successes and fails.
By Kristin from Couponing to Disney
I have seen so many posts and tips on how to make the “perfect” hard boiled egg. Believe me, I’ve tried them all. Almost everyone says to bring water to a boil, cover, remove from heat, and let stand. I have done that, and it works okay, but I’ve found that leaving them in boiling water the entire time, works much better. Here’s what I do.
Add eggs to pot, and fill with enough water to cover the eggs. Bring water to a boil. Once it starts to boil, set your timer for 10 minutes. As soon as the 10 minutes is over, remove from heat, drain hot water, fill pot with cold water and A LOT of ice. Set the timer for another 10 minutes. When the timer goes off, drain your eggs, and they are ready to peel. They should be perfectly cooked, and they should peel easily, all thanks to the ice water bath!
Kristi is a stay-at-home homeschooling mom of two. She loves complete DIY projects especially ones that saves her money.
By Kristin from Couponing to Disney on at
This rich and creamy crock pot hot chocolate is simple to make and will have your home smelling like a chocolate factory. This recipe makes 8-10 cups of hot cocoa so consider mixing up a batch for your next gathering. Serve with a toppings bar of mix-ins such as chopped candy canes, caramel sauce, cinnamon sticks and of course marshmallows for a create-your-own hot cocoa bar and your party will be a hit!
Ingredients
1 ½ cups heavy cream
1 (14 ounce) can of chocolate sweetened condensed milk (regular or caramel could also be used)
6 cups of milk
1 tsp of vanilla
2 cups of milk chocolate chips
Simply mix all of the ingredients together into the crock pot, cover with the lid and set on low for approximately two hours. Stir occasionally and resist licking the spoon! This hot chocolate recipe is rich, creamy and delicious. Try your own variations on the recipe by using white chocolate chips and regular sweetened condensed milk or mint chocolate chips, yum!
Jessica Shockney is a mother of two and a Baltimore City Firefighters’ wife. Passionate about writing, photography, baking and gardening, she’s a busy mom trying to keep up in a Pinterest world of successes and fails.
By Kristin from Couponing to Disney on at
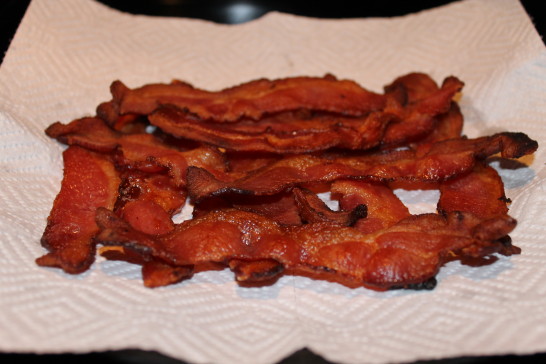
I love bacon. I mean, I really love bacon. However, I am NOT fond of the mess it makes, when I make it on the stove top. To remedy that problem, why not make it in the oven??? It’s super simple, and clean up is a breeze! Here is how to make perfect bacon in the oven:
Line a rimmed cookie sheet with aluminum foil. Place your bacon side by side on the cookie sheet. Bake in a preheated 400 degree oven for 10 minutes. Remove from oven and flip each piece over. Bake for an additional 5-10 minutes. The amount of time on the second side will depend on two things: 1) How crispy you like your bacon and 2) How thick your bacon is. I usually do 10 minutes on one side, and 6-7 minutes on the second side, for bacon that is perfectly crispy, but not burnt.

Lastly, remove your bacon from the oven, and place slices on a paper towel to drain. For clean-up, let your cookie sheets cool, then remove foil. Occasionally, some of the grease may seep through on the cookie sheet, but most times, the pan stays clean!
Kristi is a stay-at-home homeschooling mom of two. She loves complete DIY projects especially ones that saves her money.
By Kristin from Couponing to Disney on at
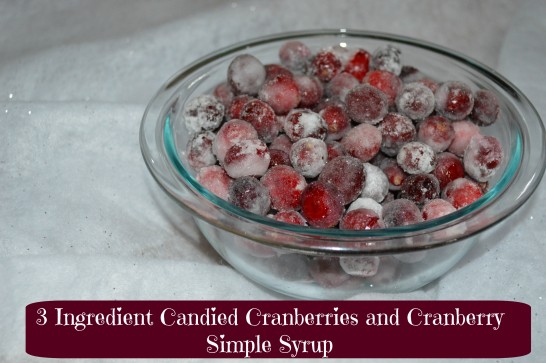
These sweet and tart little cranberries are beautiful but they are so delicious they won’t last long! With just 3 ingredients they are simple to whip up but are so impressive and pretty. The sugar coating gives them a frozen look, perfect for winter parties.
Ingredients
Heat the water and 1 cup of the sugar on the stove until the sugar is dissolved, this creates simple syrup. Pour the syrup over the cranberries in a bowl, cover and refrigerate for 8 hours or overnight. This gives the tart cranberries time to soak up the sugars and gain some sweetness. When ready to drain the cranberries reserve the simple syrup that they have been soaking in. This liquid will have turned pink and cranberry flavored, perfect for use in cocktails or to sweeten up a fruit salad. After draining the cranberries toss them in the remaining ½ cup of sugar. I blended my sugar to make it super fine and “snowy” powdered sugar would also work. Once the berries are fully coated allow to dry in a single layer on a baking sheet for 1 hour or until hardened. Candied cranberries would be a beautiful garnish for mimosas, add a splash of the cranberry simple syrup for a festive cranberry mimosa, enjoy!
Jessica Shockney is a mother of two and a Baltimore City Firefighters’ wife. Passionate about writing, photography, baking and gardening, she’s a busy mom trying to keep up in a Pinterest world of successes and fails.
By Kristin from Couponing to Disney on at
Pizza tops the list as a favorite food, and anything pizza flavored can’t go wrong. This Pizza Popcorn Seasoning will put the classic butter and salt to shame. Combining our favorite pizzeria flavors into a seasoning blend that’ll add some punch to your popcorn with just a few ingredients. Serve this popcorn at your next movie night, pack it up for kids’ lunches or bring a batch to your next tailgate party!
Ingredients
¼ tsp garlic powder
½ tsp Italian Seasoning or Oregano
½ tsp salt (I use sea salt)
¼ cup grated parmesan cheese
Pinch of chili flakes
This season mix will make enough for 8 cups of popped popcorn, if you have any leftover put into a zip lock bag and store in the fridge. The chili flakes are optional and a pinch will go a long way so use with caution especially when making for kids. You can also sprinkle the seasoning on some dinner rolls or breadsticks before cooking for some delicious pizzeria style bread.
Jessica Shockney is a mother of two and a Baltimore City Firefighters’ wife. Passionate about writing, photography, baking and gardening, she’s a busy mom trying to keep up in a Pinterest world of successes and fails.
CouponingtoDisney.com is not authorized or endorsed by, or in any way officially connected with, The Walt Disney Company, Disney Enterprises, Inc., or any of their affiliates. All trademarks, service marks,
and trade names are proprietary to Disney Enterprises, Inc., its subsidiary, affiliated
and related companies, as the case may be.
For official Disney information, visit http://www.disney.com.
Go here to read my disclosure policy